
Decorative Covering Knots

There are often times when we want to cover an object with a long and decorative knot. So I thought I would put together in one post, a selection of knots that are worth considering. I am sure that when I have finished this post, there will be certain decorative covering knots that I have missed out. However, if you are just starting out in world of decorative knot tying, you may find some of these decorative covering knots useful.
Where to Use Long Decorative Covering Knots
Perhaps you want to smarten up your favourite hiking staff by adding some fancy knot-work, or you feel inspired to make a Ditty Bag and you want to make the handle more decorative, or perhaps a bell rope or a cat of nine tails. Well, what I will do is list some knots and examples below, this should then get you started on your newest project. There will be no particular order to my list, just what comes to mind when writing this post.
Common Whipping
Common Whipping is often associated as being used on the end of rope to prevent it from fraying, but it can also be used as a very plain and simple covering knot. Perhaps, you have a knife that need a better grip or smarting up, or a plain and simple grip for your hiking stick; then a very quick and simple method to make them more decorative and useful, would be to use Common Whipping. Here you will find the Tutorial on Common Whipping. You could even take this a step further, by using two different coloured cords for your Common Whipping.

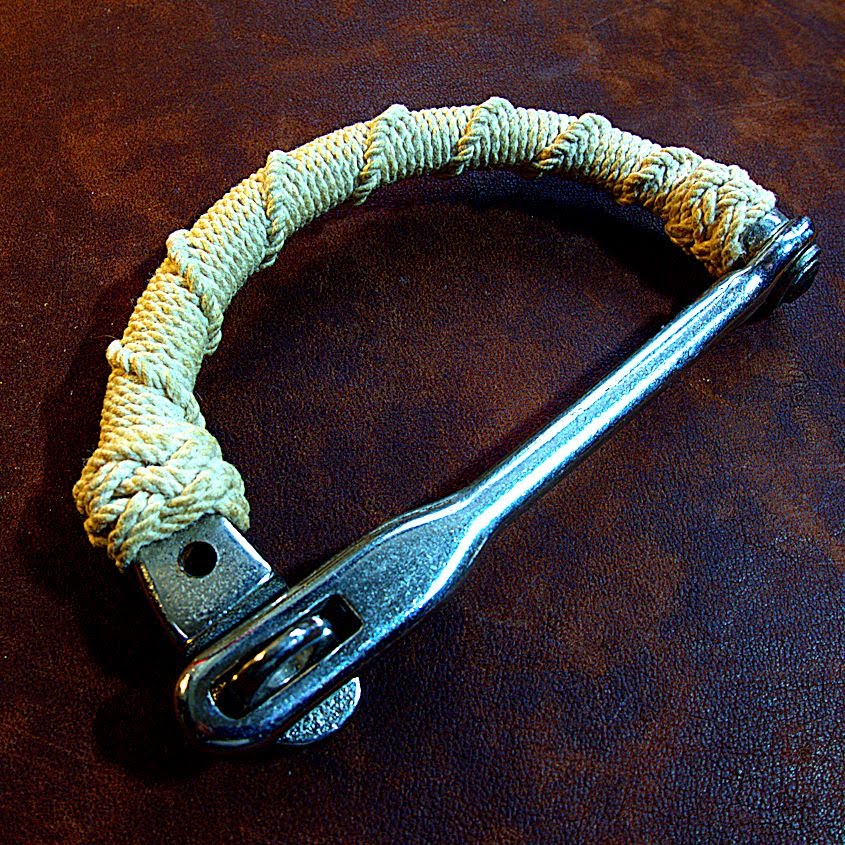
Continuous Crowning
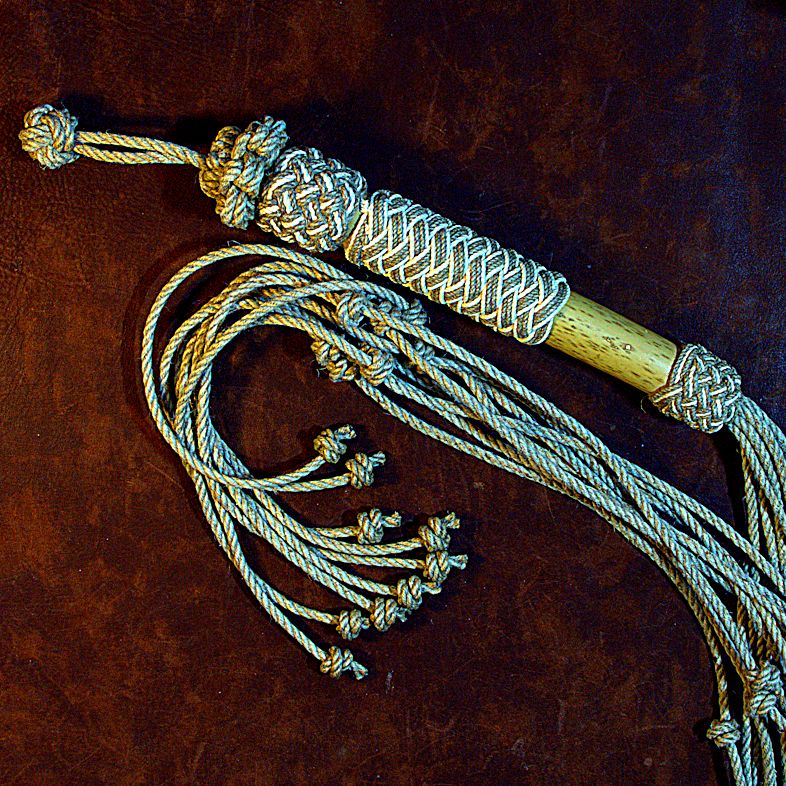
Continuous Crowning is often used as a very decorative way of long sections of your work. You will often see it being used on; Ditty Bag handles, Bell Ropes etc. Once you have used Puddening to create the basic shape of your object, you can then use Continuous Crowning to make your work stand out. Here is the video on Tying the Crown Sennit.In the photo below, you can see how the Continuous Crowning has been used on the main body of this Bell Rope. It is also worth noting that instead of using this method which creates a spiral effect, you might like to experiment with Alternate Crowning?
Cockscombing
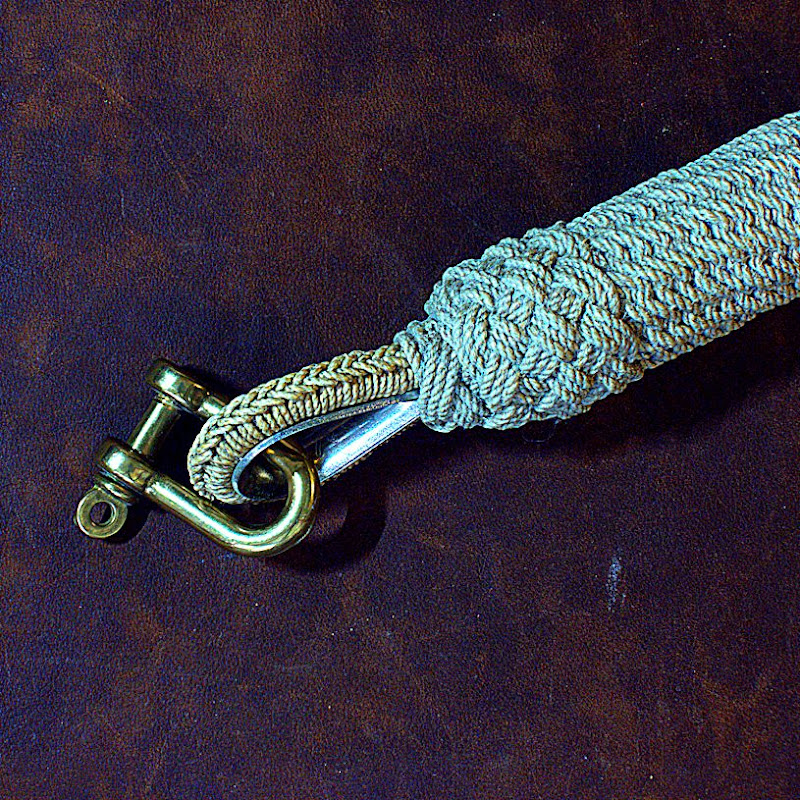
Often Cockscombing is used to protect rope from chaffing, but there is no reason why this cannot be used to great effect on other objects. If say for example, you want a lovely chevron style grip on your hiking staff, then Cockscombing will certainly make it stand out in a crowd. Here you will find the Cockscombing Tutorial. In the image below, you can see the Cockscombing around the eye of the Bell Rope. It would also be worth searching for the term Ringbolt Hitching, which is another decorative way of covering an object.
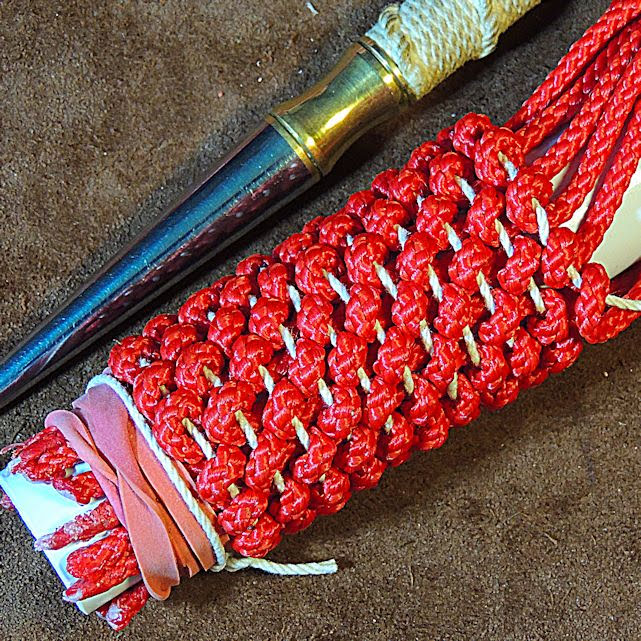
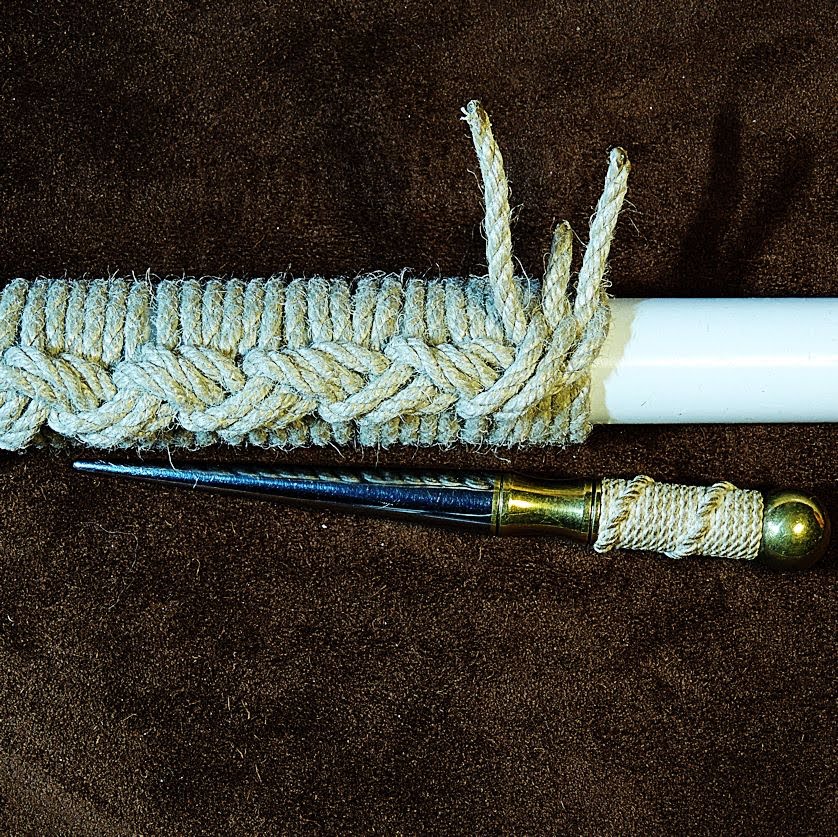
Long Turks Head
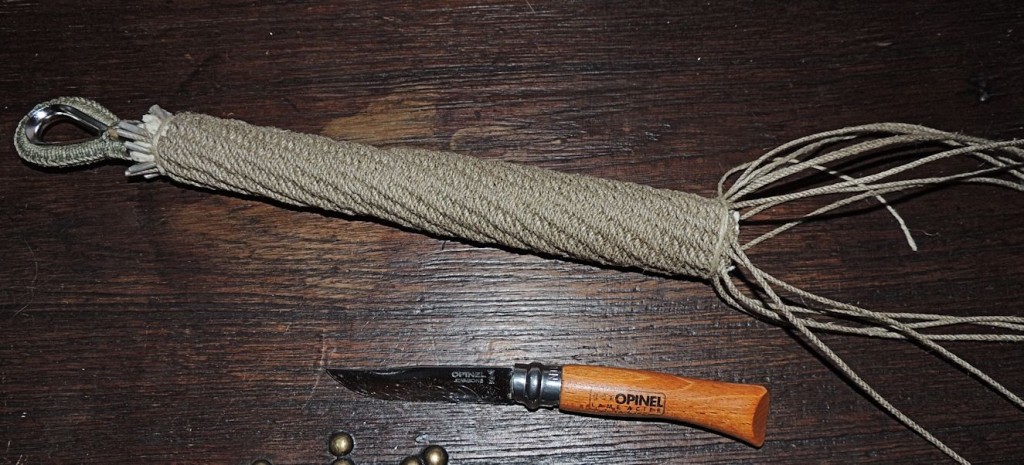
The Turks Head makes an excellent covering knot, smaller Turks Heads are often used to hide the scraggy ends of a previous layer. However it is possible to tie a nice long 2 bight and 4 bight Turks Heads to cover longer sections. I have two long Turks Head tutorials, where the cord is passed around the mandrill three times. I have not personally verified this, but if you want to make your Turks Head even longer, you increase your passes in odd numbers.You will see in the photo below that a long 4 bight Turks Head has been used on the main body of the cat or nine tails. Here are the two tutorials that may help with your project; 2 Bight Long Turks Head and here is the 4 Bight Long Turks Head. If you are just starting out, you will find that the 2 Bight Turks Head is the easier of the two to tie.
Coachwhipping
I always think that if you want a really long Turks Head effect, then maybe it is time to switch to using Coachwhipping. Coachwhipping is basically weaving a number of strands around the object that you want to cover. You will find here the Coachwhipping Tutorial, which also includes an instructional video by John Trevvitt.
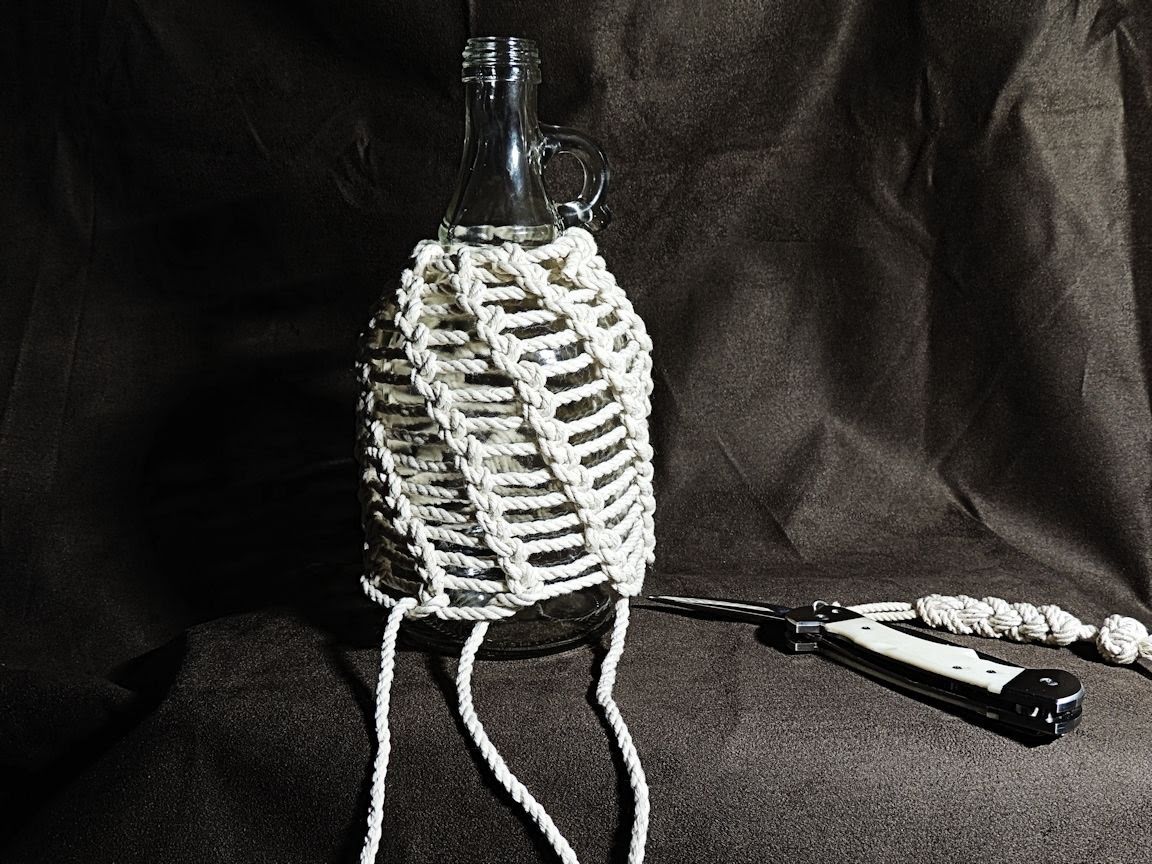
Half Hitching or Spiral Hitching
This is another great way of adding a decorative covering to your work. It is not very difficult to do, the real art is keeping the tension the same as you create each half hitch as you go around. Once you become more skilled at it, you can also change direction, increase of decrease the half hitching. Here you will find the tutorial on Half Hitching or Spiral Hitching. You will often see this form of hitching used on knife handles or as a decorative covering on a bottle.
Rib Hitching or Vertical Hitching
Very similar to Spiral Hitching, except this time the end result is that you end up with vertical lines when covering your work. Rib Hitching Tutorial
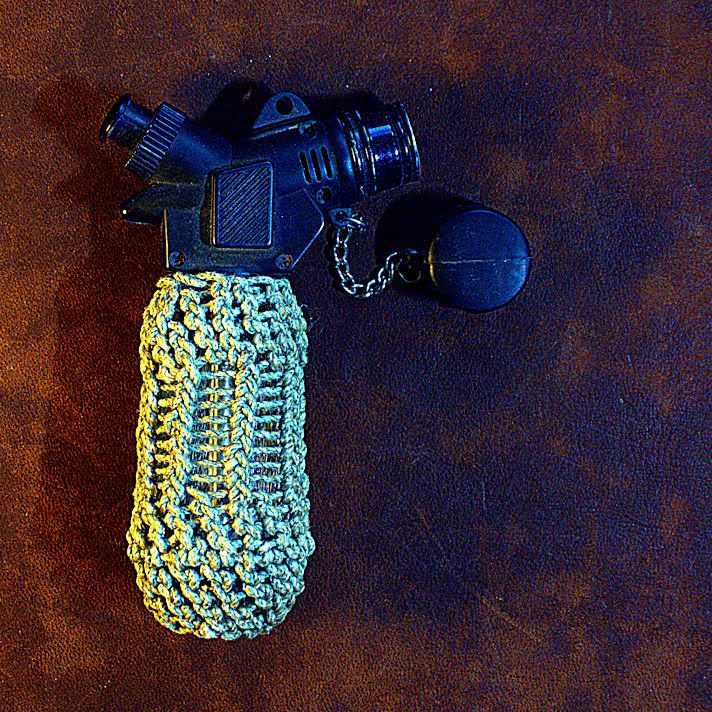
Grafting
Another great way of covering larger areas of work it to use some form of Grafting. I would say that the hardest part about Grafting, is the preparation.You just need to ensure that your strand are evenly spaced around your object. You can find a simple Grafting Tutorial here. Also when it comes to Grafting, you can do underhand or overhand, or maybe just a simple over two and then under two as your go round. Also using different coloured cord can be rather effective.
French Hitching
French Hitching is a very decorative way of adding a beautiful spiral effect to a piece of work. In the image below, French Hitching has been used and then at each end a Turks Head is used to cover the scraggy end of the start and finish of the French Hitching.This post on French Hitching Tutorial will show you what to do. You could also take this a step further with a big of Moku Hitching where the in effect the two strands are used to French Hitch in opposite directions.
Zig Zag Hitching
Not too dissimilar to Cockscombing, this will give your object a nice Zig Zag effect. I would say, I thing this works better with a harder lay cordage. I remember at the time being a little disappointed with the outcome. But hey, you will only know if you do experiment with different cordage. How to Tie Zig Zag Hitching will show you how to create this one.
Knot Craft and Rope Mats by Des Pawson
If you’re in the market for a fantastic book filled with captivating decorative knotting projects, Des Pawson’s “Book on Knot Craft” is a must-have. With a collection of 60 diverse projects and 20 imaginative rope mat designs, it’s a treasure trove for knot enthusiasts. What sets it apart is its practicality – the book provides clear guidance on the specific length of cordage or rope needed for each project, making it a user-friendly choice for both beginners and seasoned knot crafters. Pawson’s expertise shines through, making this book an enjoyable and comprehensive guide to the art of knot crafting.
 | Knot Craft and Rope Mats: 60 Ropework Projects Including 20 Mat Designs by Des Pawson Rating: |
Conclusion
Hopefully some of these covering knots will inspire you to use them in your next project. I am also sure that many people will be shouting at the screen, saying I should have also shown the such and such knot. Yes, there are many more out there, but I just wanted to show some of the more common ones. Also, wherever I can, I do try to tell you in other posts the different knots that have been used.


